

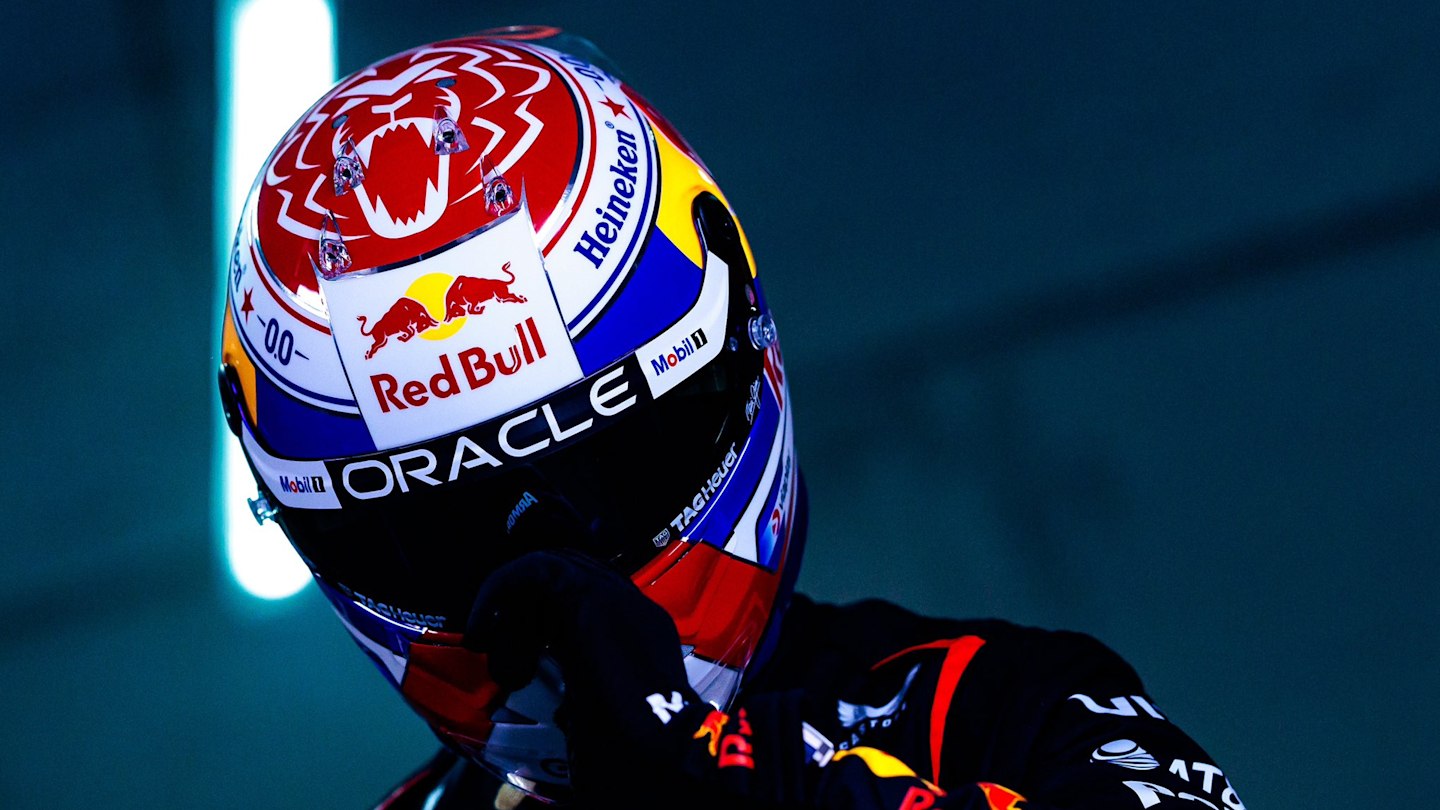
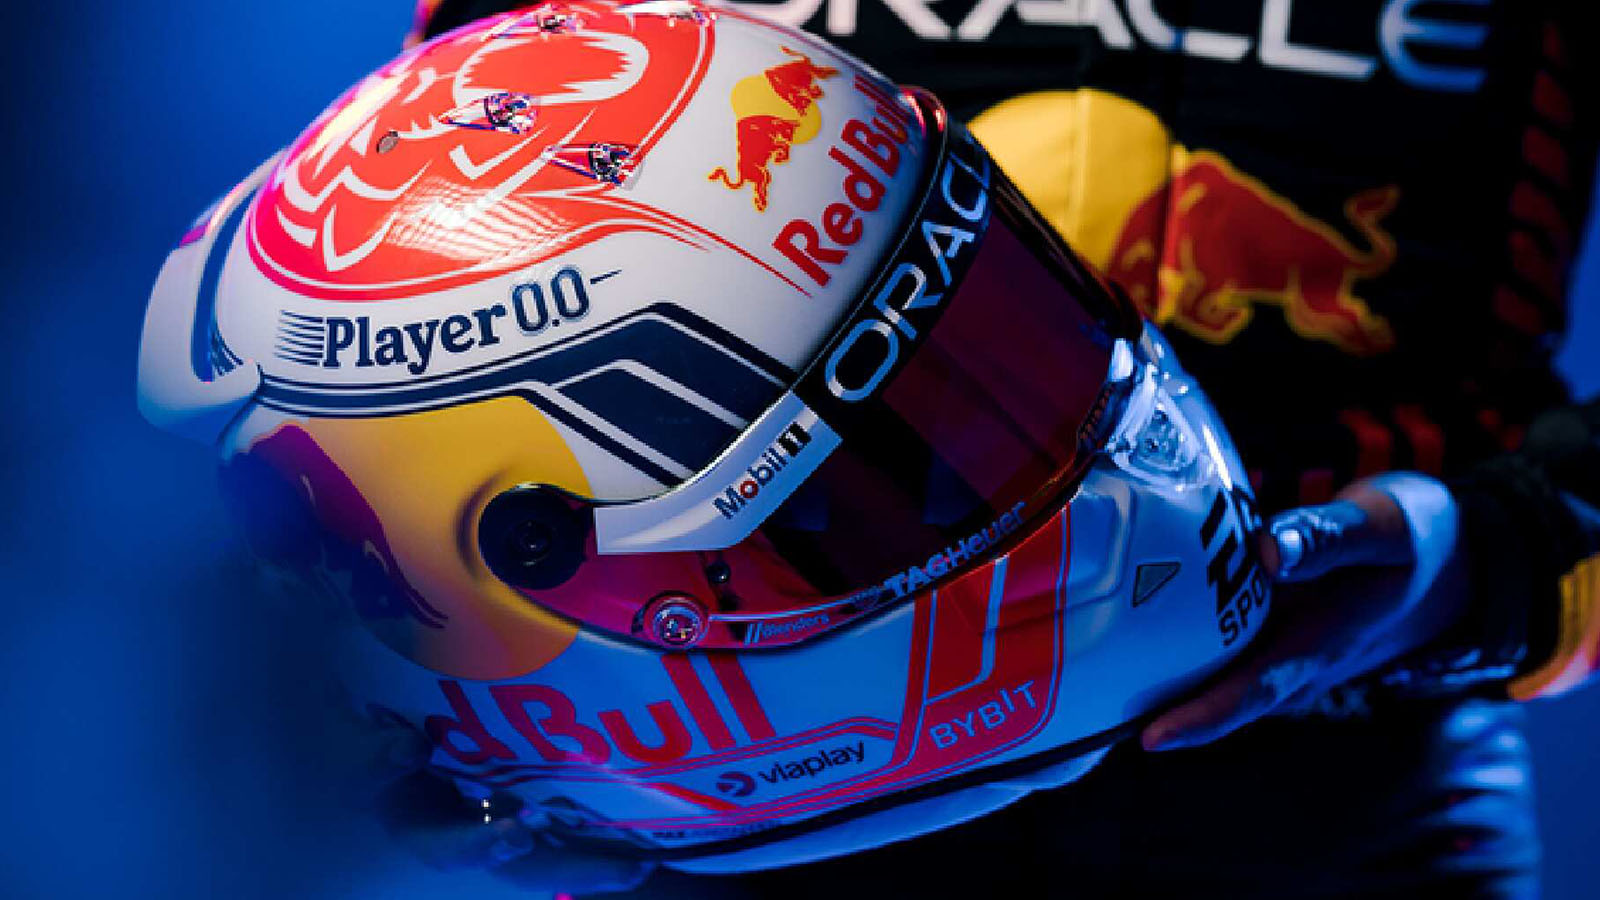
Alright, let’s talk about something I got stuck into recently. I’ve always been pretty impressed by the designs on F1 helmets, especially Max Verstappen’s lids. They just look cool, right? So, I got this idea – why not try and recreate one myself? Not like, painting a real helmet, ’cause honestly, who has the time and skill for that? I figured I’d give it a go digitally.
Getting Started
First up, I needed pictures. Lots of ’em. Jumped online and started digging for good reference photos of Max’s helmet. Searched for his current season design, trying to get all the angles – front, sides, top, even the back. You wouldn’t believe how many tiny logos and lines are crammed onto those things. Downloaded a whole bunch and chucked them into a folder so I could easily check them while I worked.
The Digital Approach
Okay, references sorted. Next, how to actually do it? Like I said, real paint was out. So, I fired up the graphics software I usually mess around with. Nothing fancy, just the program I’m comfortable using. I thought about starting with a 3D model, but decided to keep it simpler and work on a 2D template first, kind of like unfolding the helmet design.
I sketched out a basic helmet shape, trying to get the curves looking somewhat right. This took a few tries, gotta admit. Erased, redrew, tweaked it until it looked like a decent base to slap the design onto.
Laying Down the Design
Then came the fun part, adding the colors and graphics. I started by blocking out the main color areas – the signature dark blue, the big Red Bull branding, the flashes of orange. Using layers in the software was a lifesaver here, kept things organized.
Getting the details right was the real challenge, though. All those sponsor logos! Finding clean versions was tricky. Some I found easily, others I kinda had to redraw based on the photos because they were small or angled weirdly. Positioning them on the curved helmet template so they looked natural, not just slapped on, took a lot of fiddling. Rotate, resize, nudge, repeat. It was slow going.
- Spent ages on the Red Bull logo placement.
- The lion graphic on top needed careful tracing.
- Getting the thin stripes and lines to follow the helmet shape correctly was fiddly.
Finishing Touches
After getting all the main elements down, I spent some time refining things. Kept flipping back to my reference pictures, comparing my work. Adjusted some colour shades to make them pop more accurately. Added a little bit of basic shading and highlights to give it some depth, trying to mimic that glossy finish helmets have. Didn’t want it looking totally flat.
How It Turned Out
So, after a few evenings of tinkering, I had my digital recreation. Is it a perfect, professional job? Nah, definitely not. But looking at it next to the real thing, it’s recognizable! It was a pretty absorbing little project. Gave me a new appreciation for the actual helmet painters and designers – the amount of detail they work with is nuts. Anyway, just thought I’d share the process. It was a good way to kill some time and focus on something hands-on, digitally speaking.


