


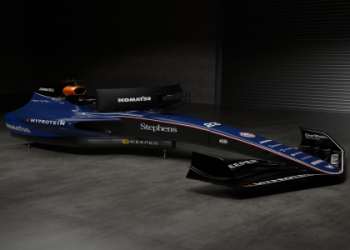
Alright folks, let me tell you about this little project I tackled recently – recreating the f1 caterham ct04. It was a blast, a real deep dive into the nitty-gritty, and I learned a ton along the way. So, buckle up, and I’ll walk you through the whole shebang.
First off, I started with the basics – gathering reference images. I scoured the internet for every angle, every detail I could find of that Caterham CT04. I’m talking high-res photos, technical drawings, even some forum posts where people were debating the exact shade of green used on the thing. The more info, the better. I wanted to get this right.
Next up was choosing the right 3D modeling software. I’m most comfortable with Blender, so that’s what I went with. I blocked out the main shapes – the chassis, the engine cover, the wings – just getting the proportions roughly correct. This stage is all about getting the overall silhouette down. Don’t worry about details just yet; focus on the big picture. Think of it like sketching the basic outline of a drawing before you start adding details.

Then the real work began. I started refining the shapes, adding details like the suspension arms, the bargeboards, and that intricate front wing. This is where those reference images became my best friends. I was constantly zooming in, comparing my model to the real thing, tweaking and adjusting until I was happy with the accuracy. It’s tedious work, but so rewarding when you start seeing it come together.
Texturing was a whole other beast. I spent a good chunk of time creating the materials – the matte green of the bodywork, the carbon fiber weave on the wings, the shiny metal of the exhaust pipes. Getting the right textures can really make or break a model. I used a mix of procedural textures and image textures, tweaking the parameters until I got the look I was after.
And of course, I had to add the livery! That’s where things got really tricky. Replicating the intricate designs and sponsor logos took some serious patience and skill. I used a combination of vector graphics software and image editing tools to create the decals, then carefully positioned them on the model.
Finally, it was time for rendering. I played around with the lighting and camera angles until I got a shot that I was happy with. After a bit of post-processing in Photoshop, the final result was something I was really proud of. It wasn’t perfect, of course, but it was a pretty damn good replica of the f1 caterham ct04.
This whole project was a great learning experience. I honed my modeling skills, learned a lot about texturing, and even picked up a few tricks for rendering. But more than that, it was just plain fun. There’s something really satisfying about bringing a complex object to life in 3D. I’m already itching to start my next project!


