


So, I’ve always wanted to have a dart board at home, you know, for some casual fun with friends or just to unwind after a long day. I finally decided to take the plunge and get one. I got the board and the darts, but I realized I had no clue how to set it up properly.
First, I searched a bit online, found some basic instructions. It seemed simple enough. The key, as I found out, was to get the measurements right. You gotta have the bullseye at the correct height and the throwing line at the right distance. Otherwise, it’s just not the same, and you are gonna look stupid in front of your buddies.
I grabbed a measuring tape and a pencil. The instructions said the center of the bullseye should be 5 feet 8 inches from the floor. I measured that out and made a little mark on the wall with the pencil. Next, I needed to figure out where to mount the board. I found a spot on the wall that seemed sturdy enough, in my garage, and held the board up against the mark I’d made. It seemed like a good spot.
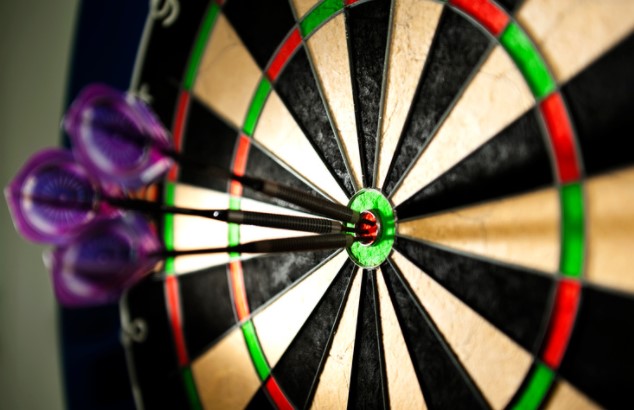
Then came the fun part – drilling! I got my drill and the appropriate screws. The dart board came with a mounting bracket, so I carefully positioned that on the wall, using the bullseye mark as a guide. I drilled a few pilot holes, making sure they were level, ’cause nobody likes a crooked dart board. Then I screwed the bracket into the wall. It felt pretty solid.
Next, I hung the dart board on the bracket. It fit perfectly! I stepped back to admire my handiwork. It looked pretty good if I do say so myself. Now for the throwing line, or the “oche” as some people call it. That needed to be 7 feet 9 and a quarter inches from the face of the board. I measured that out from the wall, and since I didn’t have any fancy tape, I just used some masking tape to mark the line on the floor.
- Measure the bullseye height: 5 feet 8 inches from the floor.
- Mark the spot on the wall.
- Position the mounting bracket and drill pilot holes.
- Screw the bracket to the wall.
- Hang the dart board.
- Measure the throwing line distance: 7 feet 9 1/4 inches from the board’s face.
- Mark the throwing line.
And that was it! I threw a few practice darts, and it felt great. It’s not rocket science, but getting those measurements right makes all the difference. Now I’m ready for some serious dart action! I might not be a pro, but at least my dart board setup is legit. Can’t wait to destroy my friends in a good game of 501!


