


Okay, folks, let’s dive into my little adventure with the Richmond International Raceway seating chart. I’m no expert, but I like to figure things out myself, and this was one of those times.
So, I wanted to grab some tickets for a race, and like anyone else, I wanted to know where I’d be sitting. I mean, nobody wants to end up behind a giant pillar, right?
Starting the Search
First, I just did a plain old search to see what came up.
Man, was I hit with a ton of stuff! A million websites, all promising the “best seats” and “amazing deals.” It was information overload, and honestly, most of it was just noise.
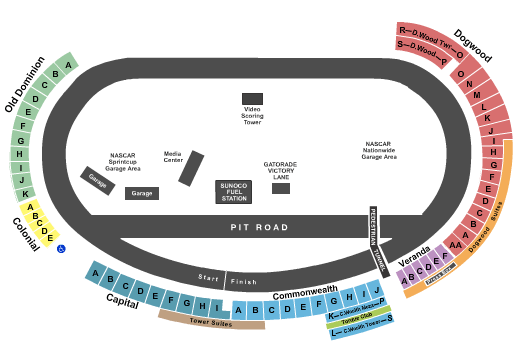
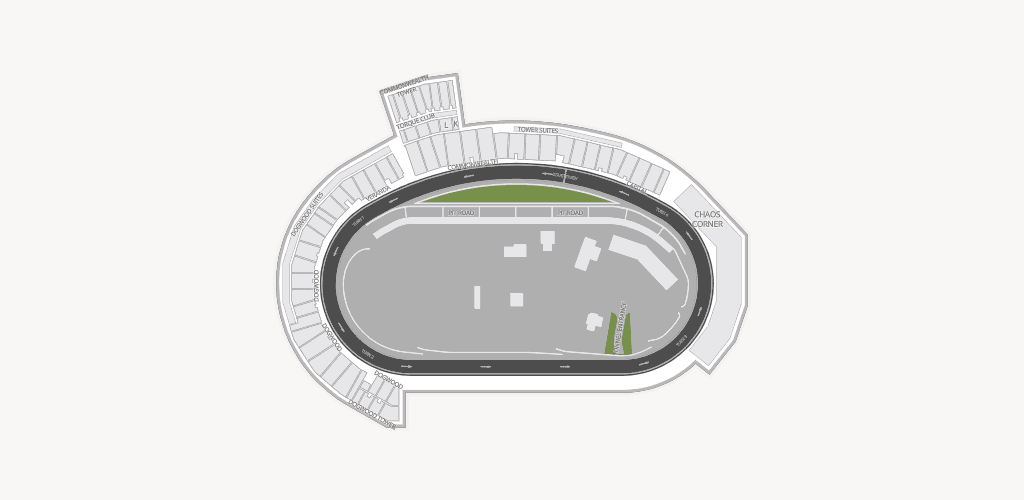
Figuring Out the Layout
After sifting through the junk, I found some basic seating charts, I went old school here and it’s effective.
I Printed it out. Yes, on actual paper! I know, I’m ancient.
I got a pen. Start to mark!
I grabbed a highlighter and started marking the sections that looked interesting. This helped me visualize the track and figure out where I didn’t want to be (like, way off in the boonies).
Narrowing It Down
My basic process was:
- Check the views: I looked at some pictures and read some reviews to get an idea of what the view was like from different sections.
- Consider the price: Obviously, I didn’t want to spend a fortune. I tried to find a balance between a good view and a reasonable price.
- Think about the sun: I wanted to make sure I wouldn’t be baking in the sun all day, I am easy to get sun burn.
Making the Decision
After all that, I finally narrowed it down to a couple of sections. It took a bit of back-and-forth, but I finally picked one that seemed like a good compromise.
It wasn’t perfect, but it was a heck of a lot better than just picking a seat at random. And, I gotta say, it felt pretty good to have done the research and made an informed decision.
The race was awesome, by the way! And yeah, my seat was pretty good. All that work paid off.


