


Alright, let’s talk dress shirt darts! I finally got around to trying these out, and man, I wish I’d done it sooner. Here’s the lowdown on my adventure.
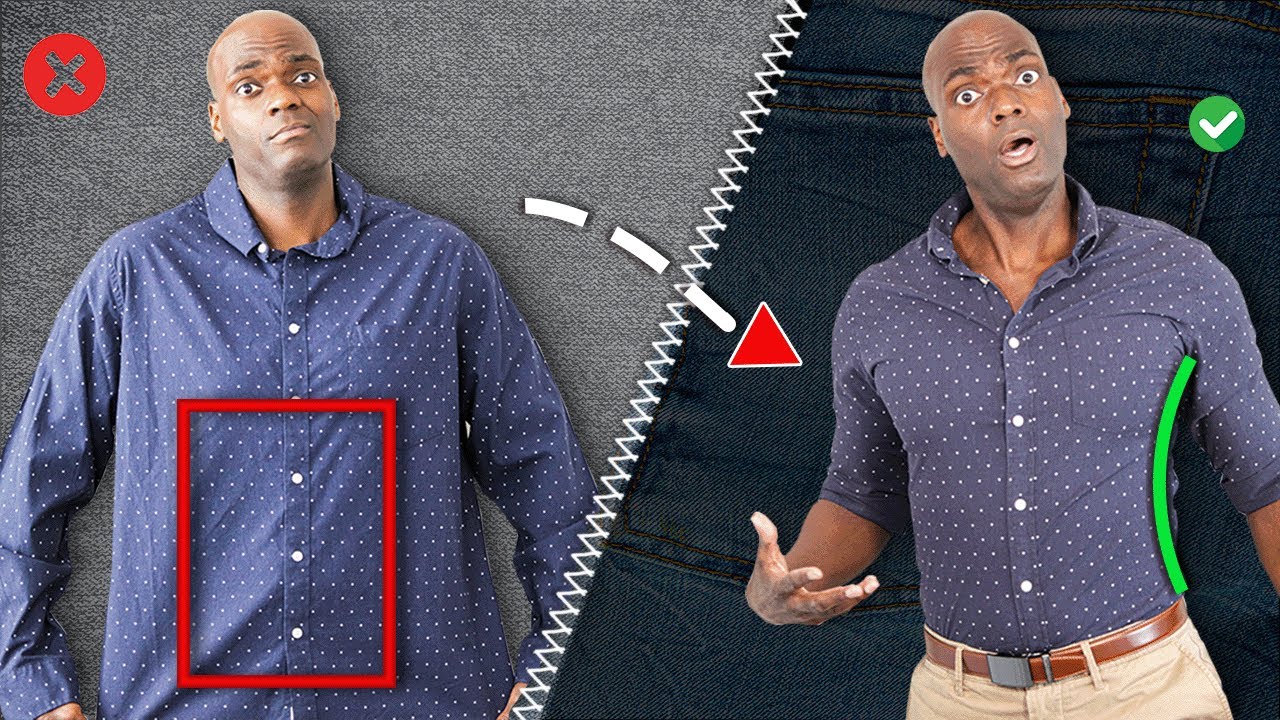
The Backstory: So, I’ve got this dress shirt, right? Nice fabric, good color, but the fit? Ugh. It billowed out at the back like a parachute. I’m no tailor, but I figured I could at least try to make it a little less… tent-like.
Getting Started: First things first, I ironed the shirt. A crisp canvas is key! Then I put the shirt on inside out and asked my wife to pinch the excess fabric in the back until it looked less baggy. We marked the pinch with tailor’s chalk – basically drawing lines down where we wanted the darts to be. I opted for two darts, symmetrically placed on either side of the center back seam.
The Sewing Begins (and the swearing…): I took the shirt off, carefully laid it flat, and double-checked the chalk lines. I wanted to make sure they were even and mirrored each other. Now, the fun part: sewing! I started each dart at the bottom hem, tapering the line inwards towards the middle of my back. You really want to gradually reduce the width of the dart as you go up, so it disappears smoothly. I used a straight stitch and backstitched at both ends of each dart to secure it. This is where the swearing came in because my sewing machine decided to act up halfway through. Seriously considered hand-stitching it at one point.
Trimming and Pressing: Once the darts were sewn, I trimmed the excess fabric inside the shirt, leaving about half an inch seam allowance. Then, I pressed the darts flat, pressing towards the center back. Pressing is HUGE – it makes the darts look so much cleaner and professional.
The Big Reveal: I turned the shirt right side out, put it on, and… BAM! It actually fit! The back wasn’t billowing anymore. It wasn’t perfect, mind you – you could still see a little bit of puckering if you looked closely – but it was a massive improvement.
- Lesson Learned #1: Basting (hand-sewing) the darts before machine sewing would have made things way easier and probably reduced the puckering. Next time, I’m definitely basting.
- Lesson Learned #2: Invest in a better sewing machine. Seriously. My old one is a relic.
- Lesson Learned #3: Don’t be afraid to experiment! It’s just a shirt, after all. If you mess up, you mess up. You can always seam rip and try again.
Final Thoughts: All in all, adding darts to my dress shirt was a win. It’s not perfect, but it’s definitely wearable now. And, more importantly, I learned something new. I might even try it on some of my other shirts now that I have the hang of it (sort of).