

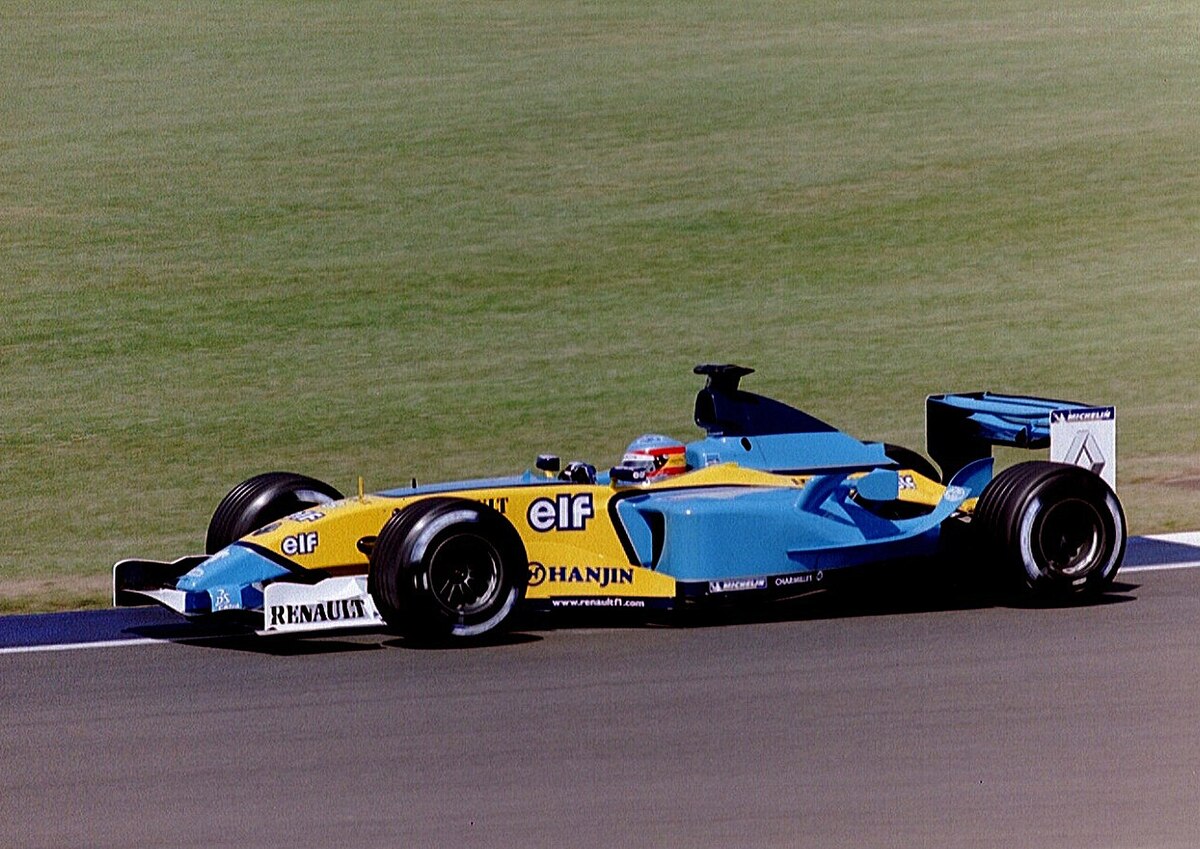
Alright, so I finally got around to tackling that Renault R203 F1 kit that’s been sitting on my shelf. Been wanting to do this one for a while, always liked the look of that car.
Getting Started
First thing I did, obviously, was open the box and just look at all the parts. You know, get a feel for it. Lots of blue plastic, typical for these kinds of kits. Spread everything out on the workbench. Instructions looked okay, maybe a bit confusing in parts, but we’ll manage.
Next up, the usual routine: washing the parts. Gave all the plastic sprues a good bath in warm soapy water. Helps get rid of any mould release agent, makes the paint stick better later on. Let them air dry completely overnight. You don’t want any water messing things up.

Building Process – Bit by Bit
I decided to start with the engine block and gearbox assembly. Seemed like a logical place. Glued the main halves together, clamped them lightly, and set them aside to cure properly. Patience is key here, rushing just makes things weak.
While that was setting, I looked at the chassis tub. Cleaned up some seam lines with a modelling knife and some sandpaper. Nothing major, just the usual prep work. Then I moved onto the suspension components. These F1 cars have some pretty intricate suspension arms and stuff. Took my time clipping them off the sprues and cleaning up the little nubs.
The instructions called for painting some parts before assembly, so I got the airbrush ready. Primed the main body panels, the chassis, engine parts, and wheels. Used a grey primer, works well for most colours.
Painting and Decals – The Fun Part?
Once the primer was dry, I started laying down the main colours. That distinctive Renault blue first. Took a couple of light coats to get it nice and even. Then masked off areas for the yellow bits – the Mild Seven sponsorship colour. Masking is always a bit tedious, but worth it for clean lines. Also painted the smaller details like the black suspension arms, silver engine parts, and the wheel rims.
Decals… oh boy, decals. F1 cars are covered in them. This R203 kit was no exception. Lots of tiny sponsor logos. Applied them one by one using decal solution to help them settle down over the curves. This took ages. Seriously, probably the most time-consuming part. Had a few tricky ones around the engine cover curves, had to use extra setting solution there.
- Carefully cut out each decal.
- Soaked in water.
- Slid onto the model.
- Positioned with a cotton bud.
- Applied decal solution.
After the decals were fully dry, usually wait a day or so, I gave the whole body a clear coat. Helps seal the decals in and gives it a nice finish. I went for a semi-gloss, felt right for this car.
Final Assembly
Now for bringing it all together. Attached the engine/gearbox assembly to the chassis tub. Fitted the suspension components carefully. Connected the wheels. Glued on the front and rear wings. Added the smaller fiddly bits like mirrors, antennas, and bargeboards. Some of these tiny parts were a real pain, almost lost one of the mirrors to the carpet monster, but found it eventually.
Fitted the main engine cover and bodywork onto the chassis. Everything lined up reasonably well, thankfully. No major fit issues, which was a relief.
End Result
So yeah, that’s the process. Took a fair bit of time over several evenings and a weekend. End result? It looks like a Renault R203, sits there on the shelf looking pretty decent. Happy with how the paint and decals turned out, despite the effort. It was a good build, not too complicated but kept me busy. Glad I finally got it done.


