


Okay, here’s my take on a blog post about installing hood locks on a NASCAR race car, written in a casual, first-person style:
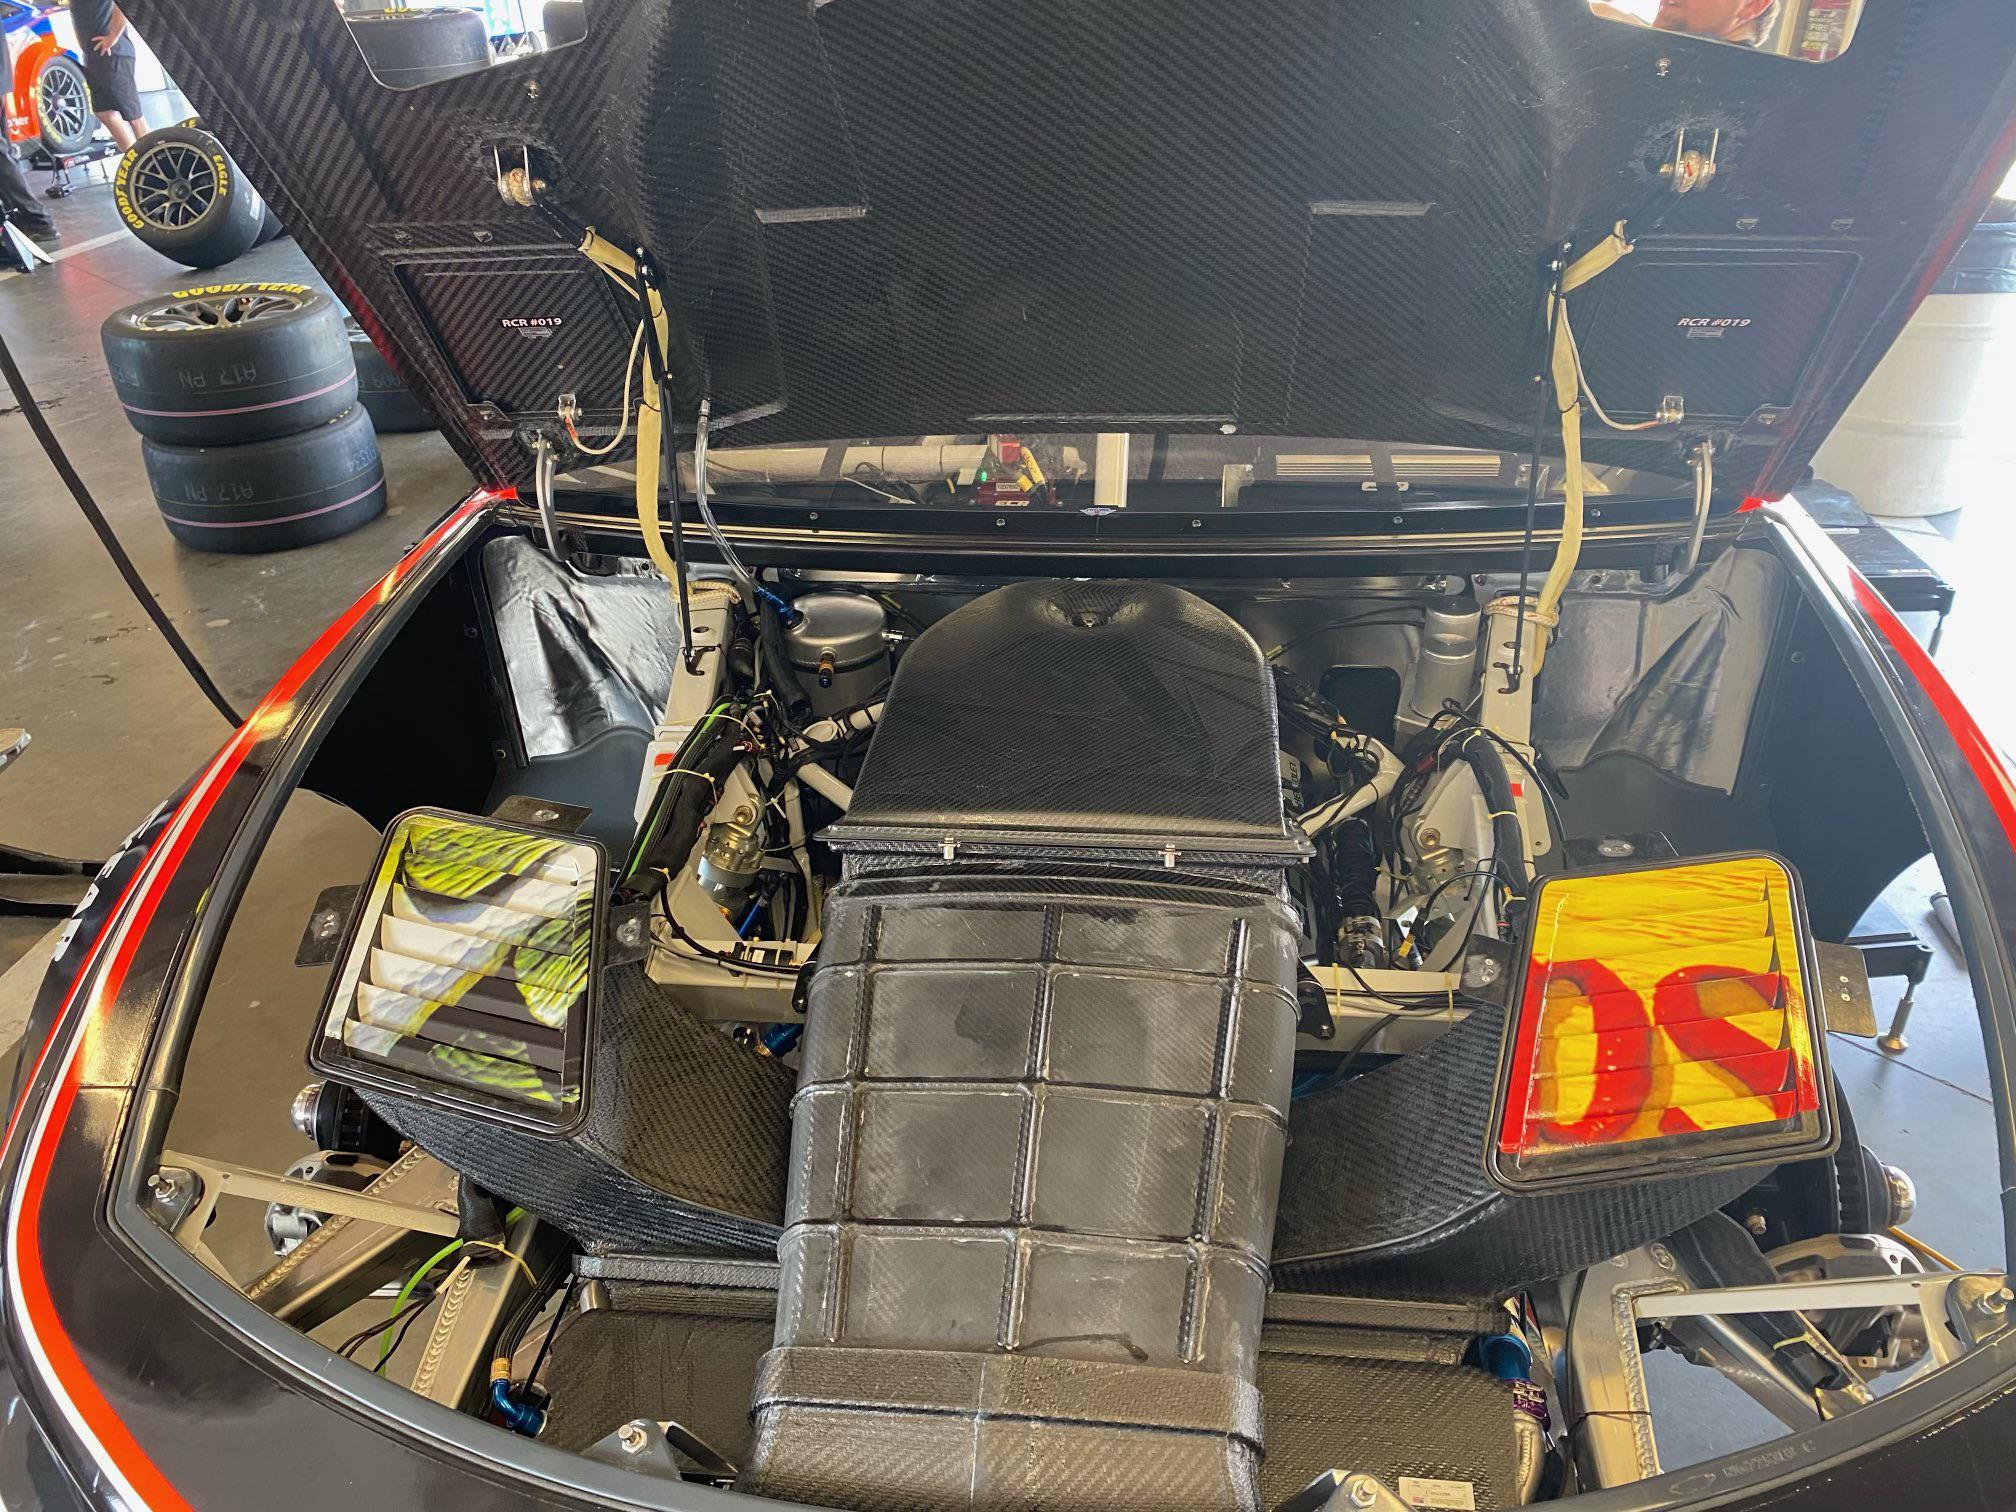
So, I was messing around in the garage the other day, and it hit me – those NASCAR cars have those super cool hood pins. I figured, “Why not? Let’s try to get that look!” I’ve always thought they added a raw, mechanical vibe, and besides, who doesn’t want a little extra security for their hood?
First things first, I grabbed my tools. Nothing fancy, just the basics: a drill, some bits, a wrench set, and of course, the hood pin kit itself. I went with a pretty standard kit – nothing too flashy, just functional. Make sure you’ve got everything laid out before you start. It saves you from running around like a headless chicken later.
Getting Started: Marking and Drilling
The scariest part, no doubt, is drilling into your perfectly good hood. I measured, like, five times before I even touched the drill to the metal. I marked the spots where I wanted the pins to go, making sure they were symmetrical and lined up with the frame underneath. Eyeballing it is a recipe for disaster – trust me, been there, done that (not on this car, thankfully!).
Once I was absolutely sure, I started with a small pilot hole. This is key! Don’t go full-bore with a big drill bit right away. Work your way up gradually. I used a couple of different sized bits to get the hole just right for the pin’s base.
Installing the Hardware
With the holes drilled, it was time to mount the scuff plates and the base plates. The scuff plates are the ones that are seen from outside. It protects your car body paint.
The base plates are the ones attached under the hood. These guys are what actually hold the pins. I screwed everything in, making sure it was nice and snug. You don’t want these things rattling loose at high speeds!

- Step 1: Drill the main holes.
- Step 2: Attach the scuff plates.
- Step 3: Attach the base plates.
Final Touches and Adjustment
Finally, I installed the pins themselves. These just slide through the scuff plates and into the base plates, and then you secure them with the little clips or whatever mechanism your kit uses.
It might take a little fiddling to get everything lined up perfectly. Make sure the hood closes smoothly and the pins engage properly. You might need to adjust the height of the base plates a bit to get the tension just right.
And that’s pretty much it! It’s a surprisingly straightforward job, and it definitely adds a cool, race-inspired look to your ride. Plus, you’ve got that extra peace of mind knowing your hood isn’t going anywhere, even if you’re pushing it to the limit (on a closed course, of course!). Just take your time, double-check everything, and don’t be afraid to get your hands dirty!


